🔑 Discord Bot Credentials
For your Discord Bot to work, you need to set up a few environment variables to authenticate with Discord.
These are secret values that you should never share with anyone. They're stored in a .env file, which is automatically loaded by Robo.js when you start your project.
What You Need
Get the following environment variables from the Discord Developer Portal.
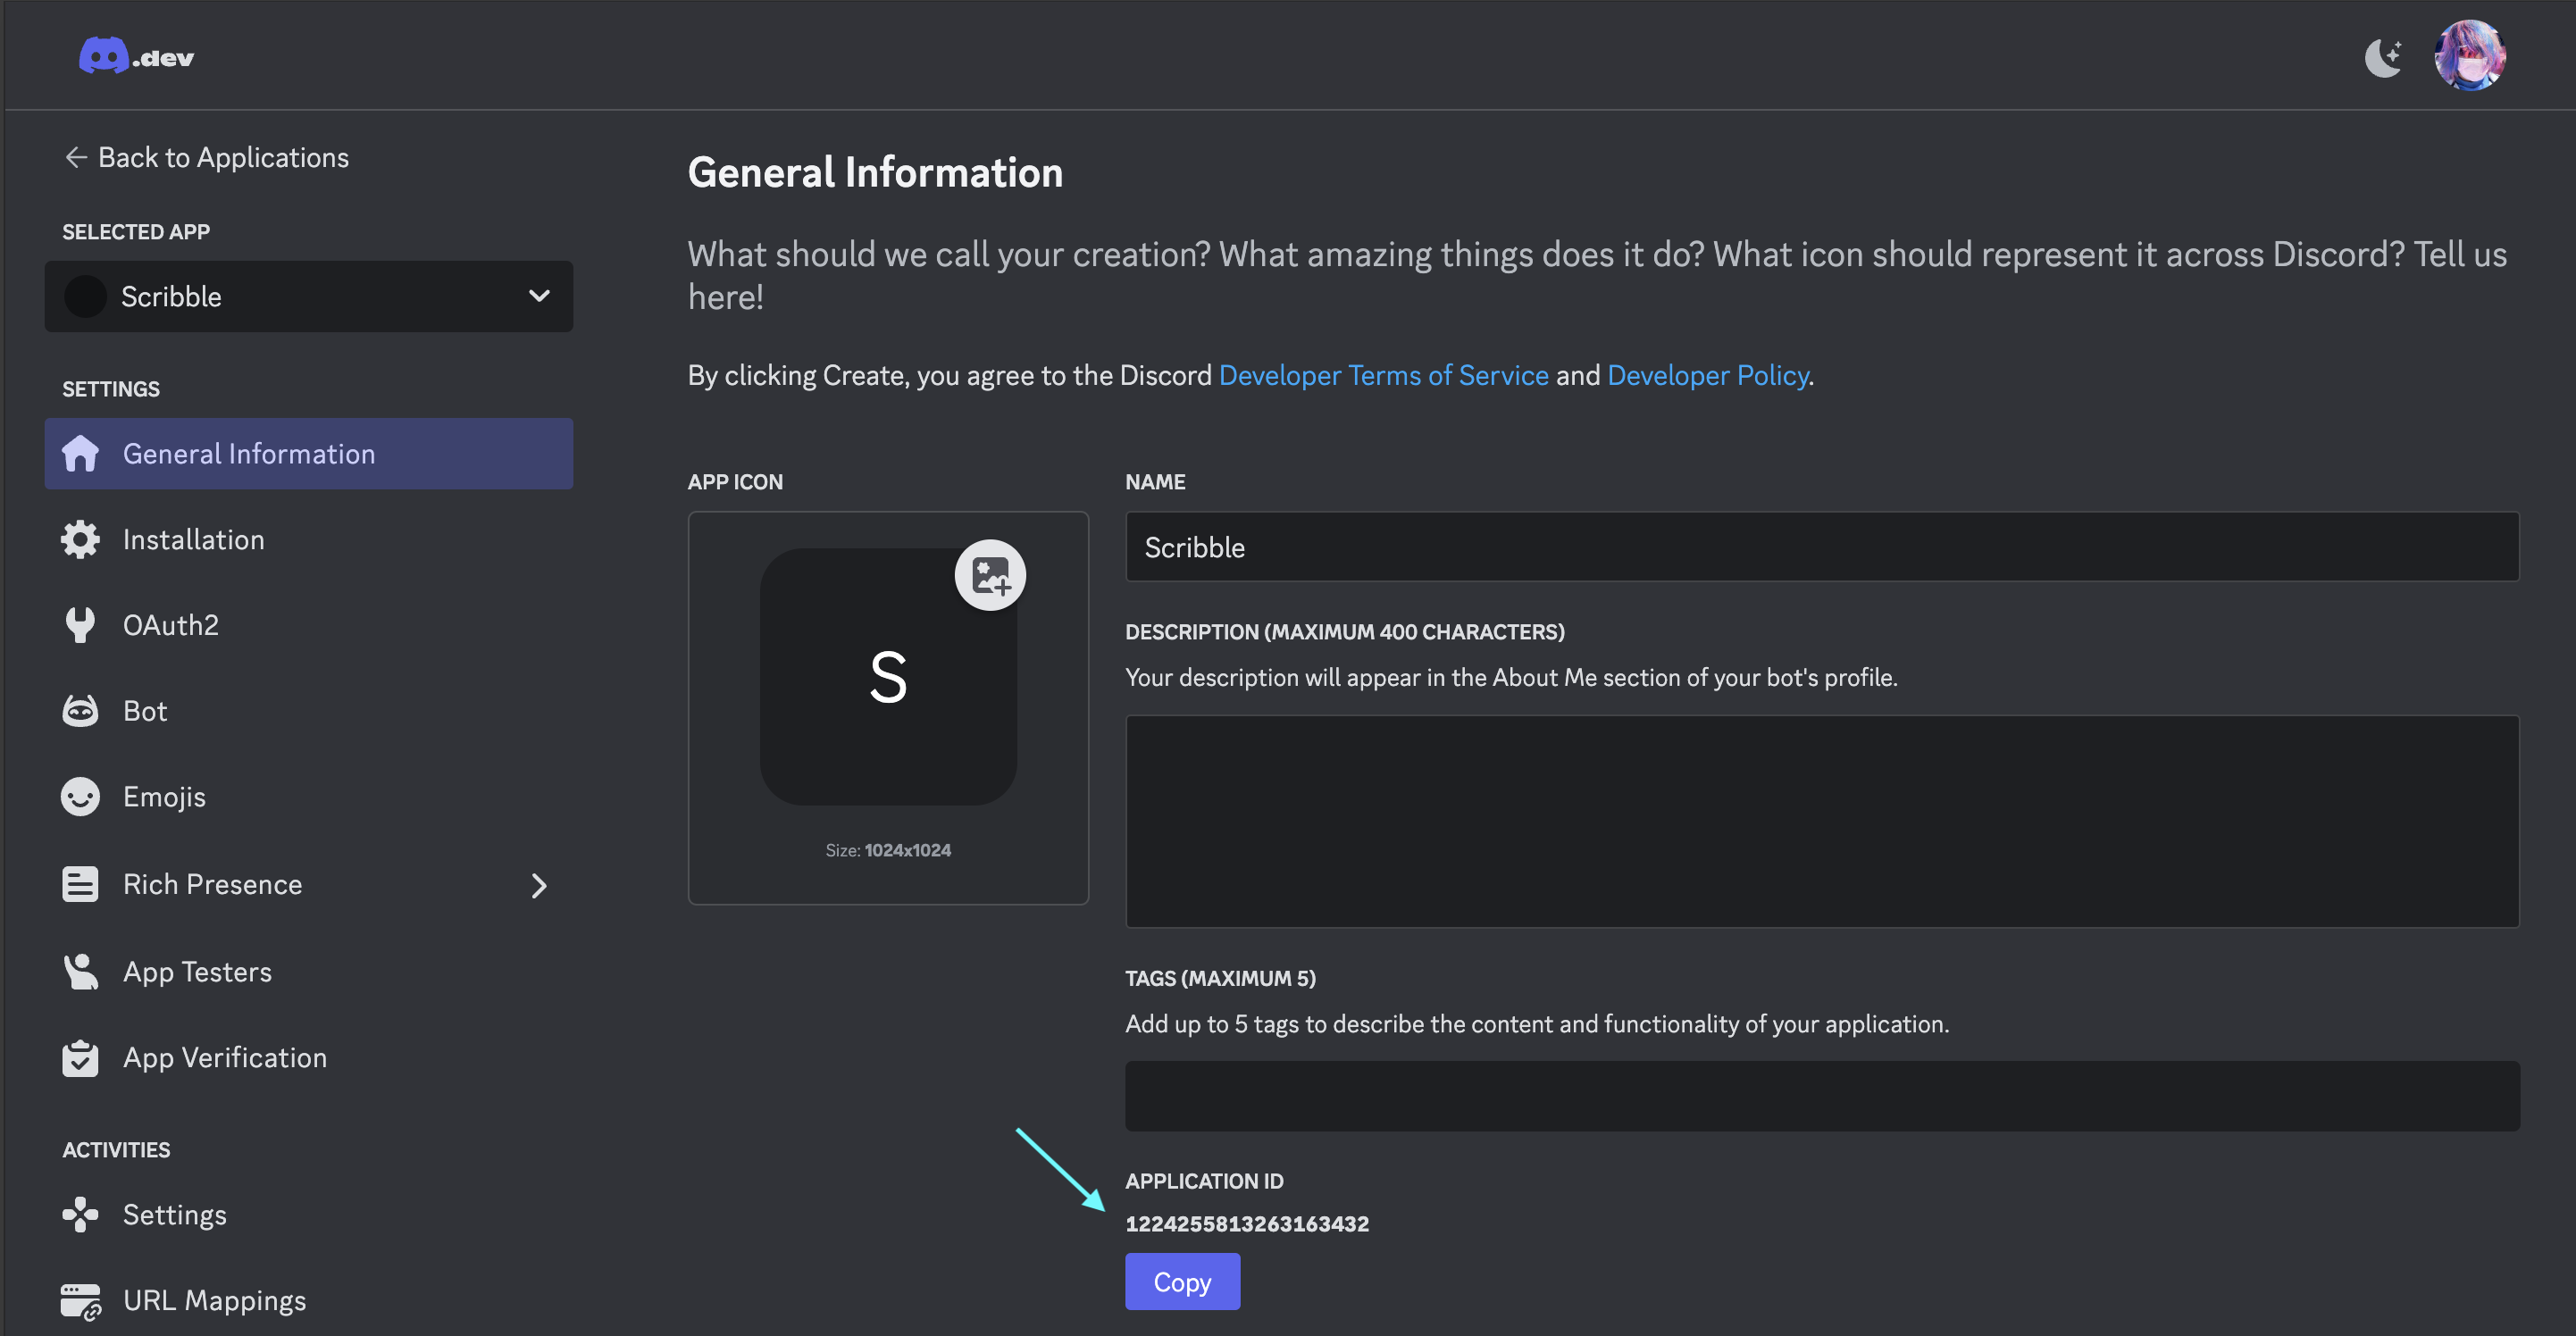
Client ID
This is your Discord Application ID, found in the Discord Developer Portal. Sign in with your Discord account, click on your bot application, and find the Application ID in the General Information tab.
In your .env file, add the following line:
DISCORD_CLIENT_ID="your_application_id"
Don't forget to replace your_application_id with the value you just obtained!
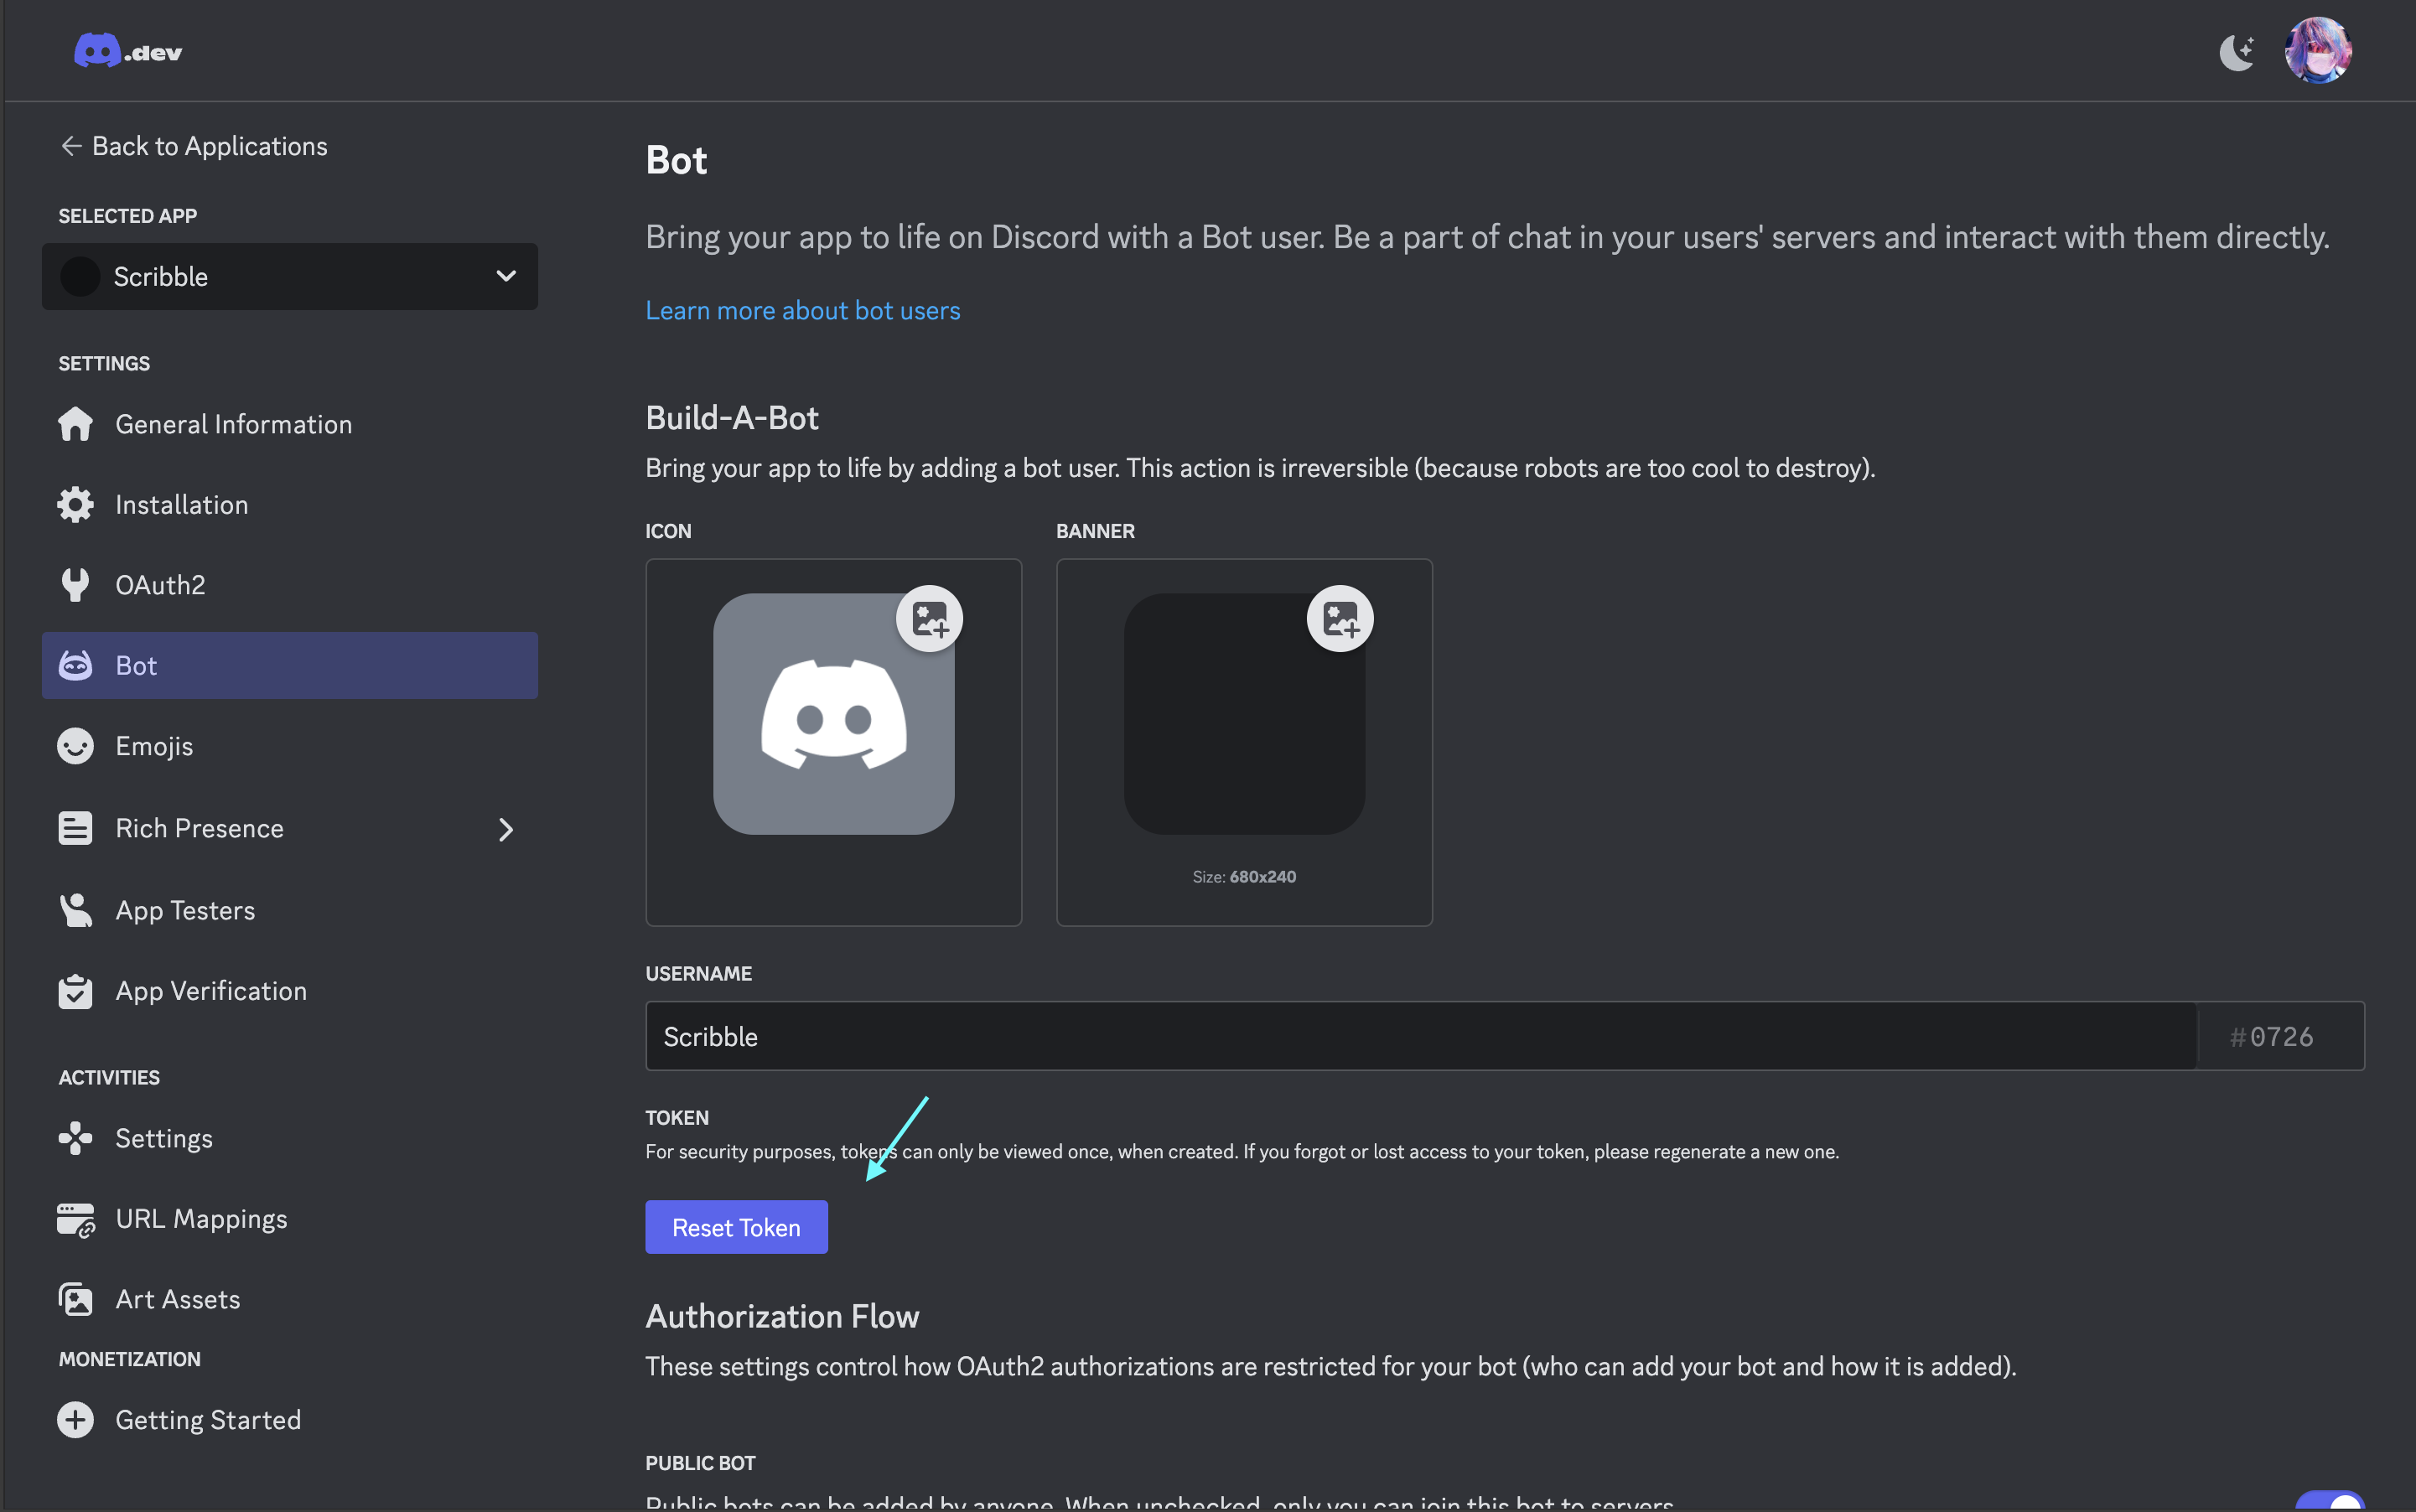
Discord Bot Token
This is your Discord Bot Token, found in the Bot tab of your app under the Token section near the top. You may need to reveal it by clicking Reset Token.
In your .env file, add the following line:
DISCORD_TOKEN="your_bot_token"
Optional Variables
The environment variables below are not strictly necessary, but they're sure to make your life easier during development and testing.
DISCORD_GUILD_ID
Setting up a DISCORD_GUILD_ID environment variable is a neat trick for testing. It ensures that any new commands you create only get applied to the Discord server this ID belongs to. To get the DISCORD_GUILD_ID, follow these steps:
- Open Discord and navigate to the server you want to use.
- Right-click the server icon and click "Copy ID."
In your .env file, add the following line:
DISCORD_GUILD_ID={your_guild_id}
Replace {your_guild_id} with the value you just obtained.
DISCORD_DEBUG_CHANNEL_ID
The DISCORD_DEBUG_CHANNEL_ID environment variable is useful for directing errors to a specific channel during development. This helps developers focus on the task at hand and handle async errors that may occur during development and are out of their control. To get the DISCORD_DEBUG_CHANNEL_ID, follow these steps:
- Enable Developer Mode in Discord by going to User Settings > Advanced > Developer Mode.
- Navigate to the channel you want to use as your debug channel.
- Right-click the channel and click "Copy ID."
In your .env file, add the following line:
DISCORD_DEBUG_CHANNEL_ID={your_debug_channel_id}
Remember to replace {your_debug_channel_id} with the value you just obtained.
Using DISCORD_DEBUG_CHANNEL_ID is not strictly necessary, and we gently discourage its use. You shouldn't just shove errors away in a place where you can ignore them. Instead, check out the Debugging Documentation to learn how to handle errors effectively.
Enabling Developer Mode in Discord
Enabling Developer Mode in Discord allows you to access handy features, like copying IDs for servers, channels, and users. To enable Developer Mode, follow these simple steps:
- Open Discord.
- Click on the gear icon in the lower-left corner to open your User Settings.
- In the left sidebar, scroll down and click on "Advanced."
- Toggle on the "Developer Mode" switch.
That's it! You now have Developer Mode enabled, unlocking a world of possibilities for your bot development journey. 🚀
Keep It Secure
Make sure to keep your .env file safe and never share it with anyone. If you accidentally expose your credentials, you can regenerate them in the Discord Developer Portal.
Remember to add .env to your .gitignore file to prevent it from being pushed to your repository.
.env
Don't worry, Robo.js will automatically load your environment variables when you start your project.