🔰 Beginner Guide
This guide will help explain the basics of Discord Activities. We'll assume you're already familiar with web concepts like HTML, CSS, and JavaScript. Don't worry, you don't need to be an expert as long as you know the basics.
Before we get started, make sure you have Node.js installed alongside VS Code or your favorite code editor.
Getting Started
We recommend using Create Robo or RoboKit to get started. Make sure your Discord Activity Credentials are ready.
npx create-robo <projectName>This will help spawn a new Robo.js project as a Discord Activity. We call these Robos.
Once complete, you can run it in your Terminal.
npm run devMake sure your Discord Activity Credentials are ready.
Core Concepts
Everything is in one place in Robo.js, making it easy to manage without proxying separate projects.
Unlike normal Web Apps, there's a few quirks to Discord Activities:
- Authenticate with Discord: Use Discord's Embedded App SDK to authenticate your users.
- Follow Discord Proxy rules: Discord has a Proxy that you need to know about.
- Tunnels are your friend: You can't just use
localhostin Discord, so we provide Tunnels to help. - Websockets for games: If you're building a game, you'll want to use WebSockets.
Frontend Client
The frontend client is where you build the user interface for your Discord Activity. Even though you can use any UI library, we recommend React for best compatibility with Robo Plugins.
You find the frontend code in the /src/app folder in our Starter Templates.
- Javascript
- Typescript
import { useDiscordSdk } from '../hooks/useDiscordSdk'

export const Activity = () => {
	const { authenticated, discordSdk } = useDiscordSdk()

	return (
		<div>
			<img src="/rocket.png" className="logo" alt="Discord" />
			<h1>Hello, World</h1>
		</div>
	)
}
import { useDiscordSdk } from '../hooks/useDiscordSdk'

export const Activity = () => {
	const { authenticated, discordSdk } = useDiscordSdk()

	return (
		<div>
			<img src="/rocket.png" className="logo" alt="Discord" />
			<h1>Hello, World</h1>
		</div>
	)
}
Use Discord's Embedded App SDK to interact with Discord APIs.
You can structure frontend code however you like. Just make sure to exclude folders from the watcher in your Robo Config.
Frontend code is handled by Vite, a fast build tool for modern web development.
Backend Server
The backend server is where you handle stuff like Authentication and custom features. You can use any backend library you like, but we recommend @robojs/server for its simplicity and best compatibility with Robo Plugins.
You can create new API Routes in the /src/api folder named after the path you desire.
- Javascript
- Typescript
export default () => {
	return 'Hello, World!'
}
export default () => {
	return 'Hello, World!'
}
Nest for subroutes, use async functions, return objects or RoboResponse, read from RoboRequest, and more.
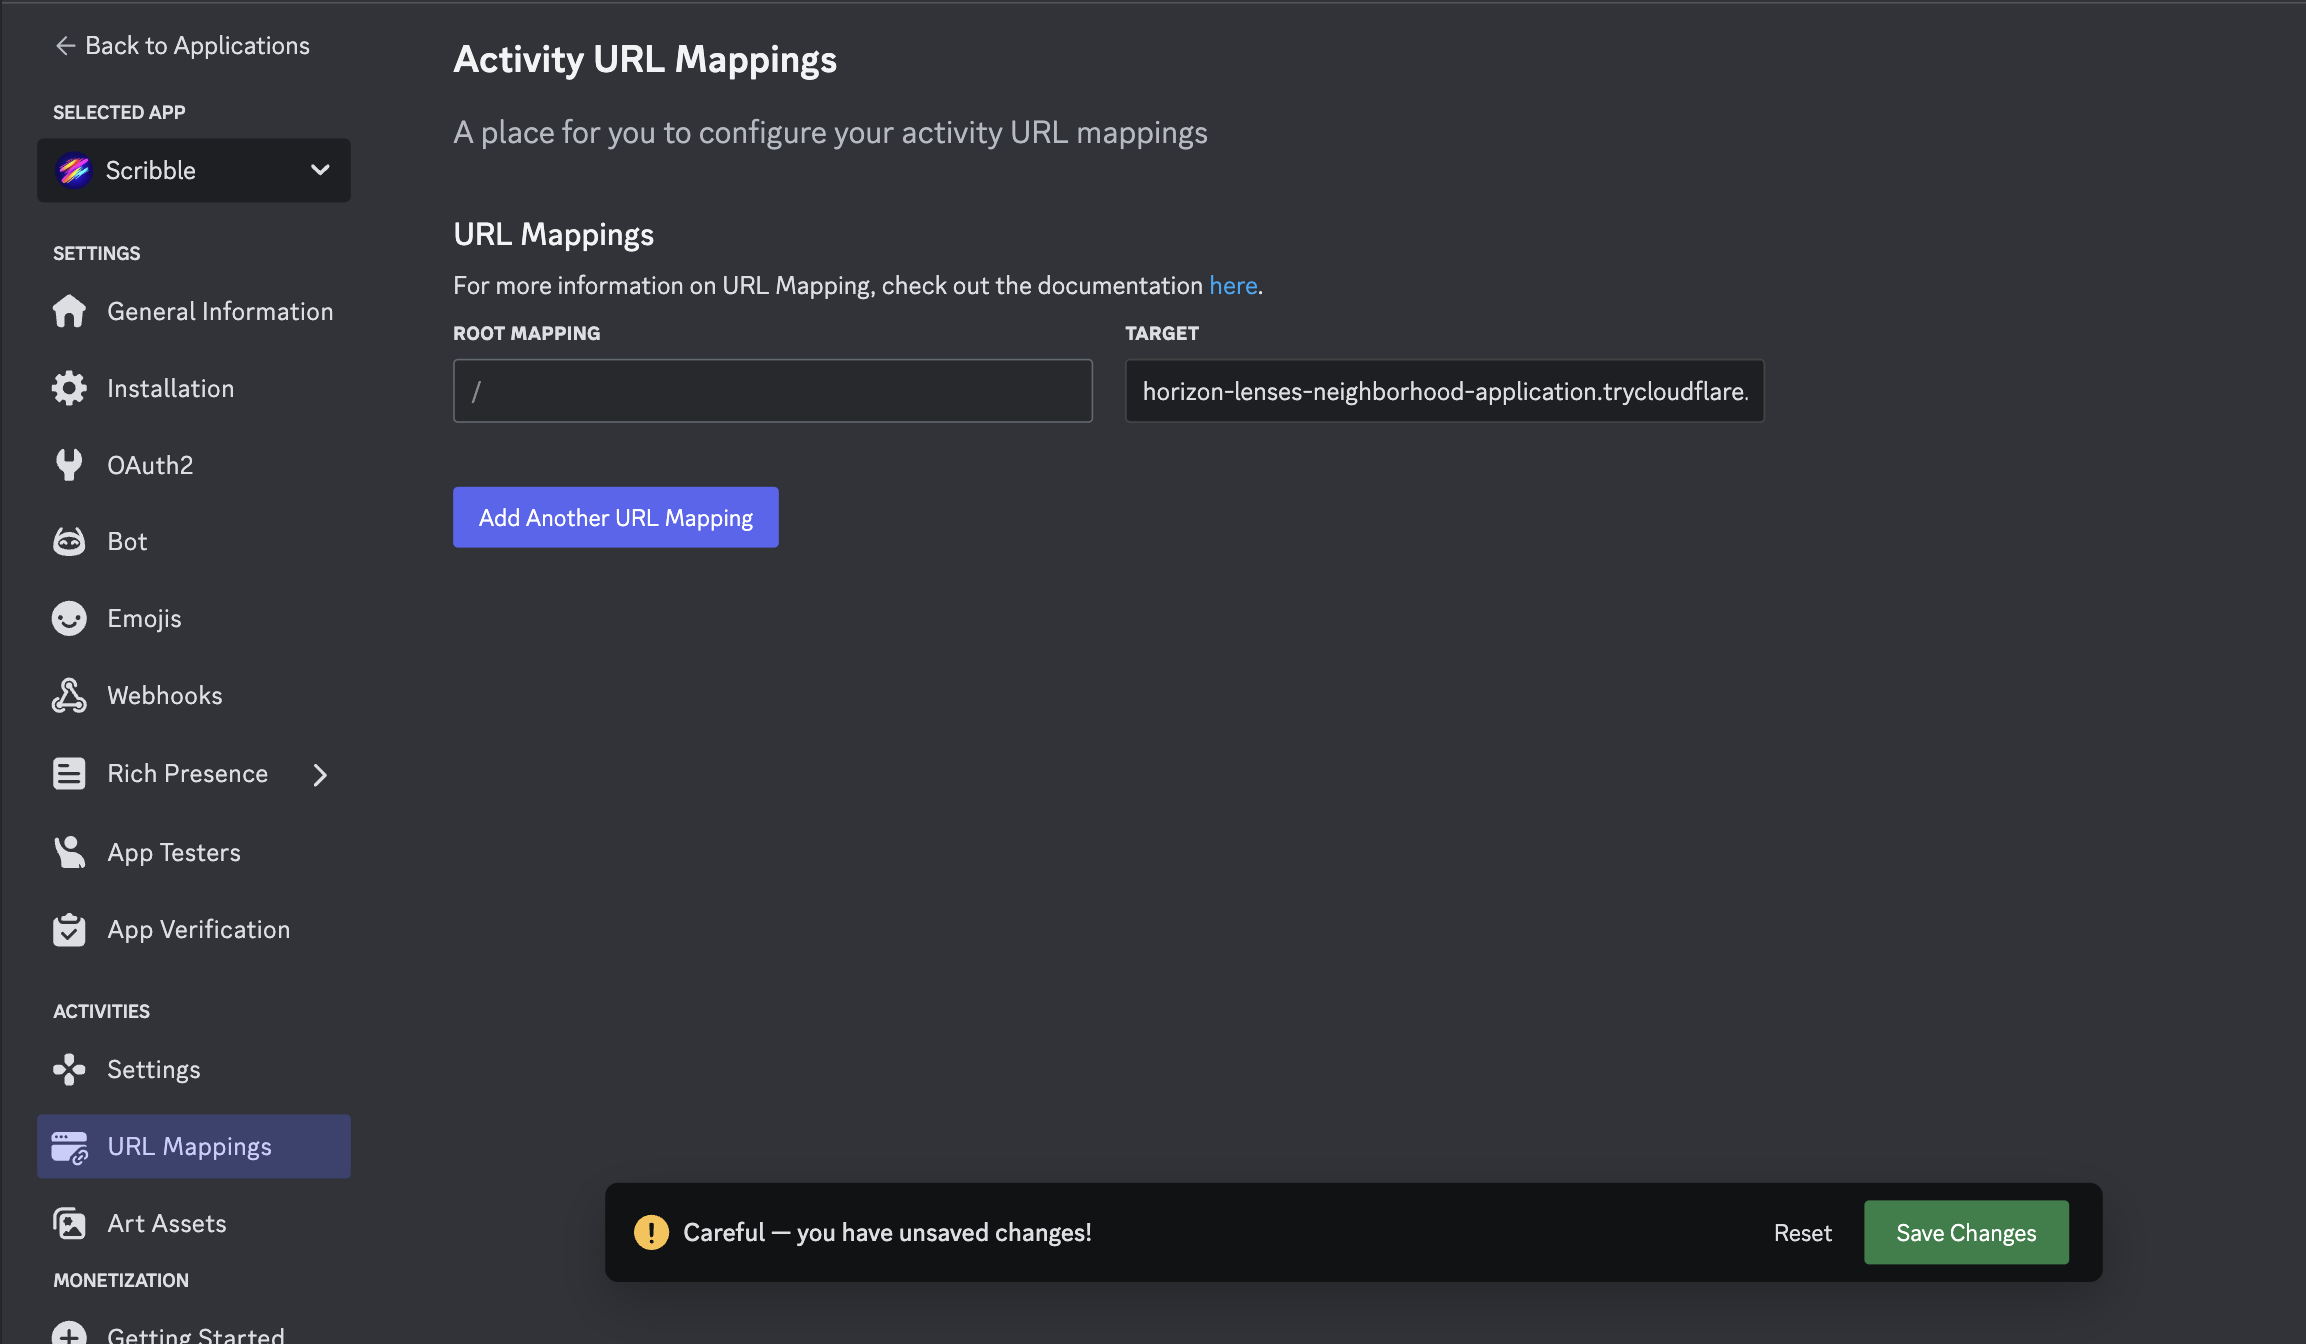
Tunneling
Discord doesn't allow localhost URLs, so you need to use a tunnel to expose your local server to the Internet. Robo.js helps you manage a free Cloudflare Tunnel to simplify this process.
When you run your Robo, you'll see a URL in the terminal. This is your tunnel URL.

Copy and paste this URL into your Discord Developer Portal as your root mapping and save changes.
Authenticate your Users
To do anything with Discord, you need to authenticate your users. Robo.js makes this easy in your App.tsx file.
import { DiscordContextProvider } from '../hooks/useDiscordSdk'
import { Activity } from './Activity'
import './App.css'

export default function App() {
	return (
		<DiscordContextProvider authenticate scope={['identify', 'guilds']}>
			<Activity />
		</DiscordContextProvider>
	)
}
This will prompt users to grant you access to their User Identity and Guilds. Customize the scope to request more permissions.
const { accessToken, session } = useDiscordSdk()
Testing on Discord
Once you're ready to test your Discord Activity, you can run it in a Discord Channel or Direct Message.
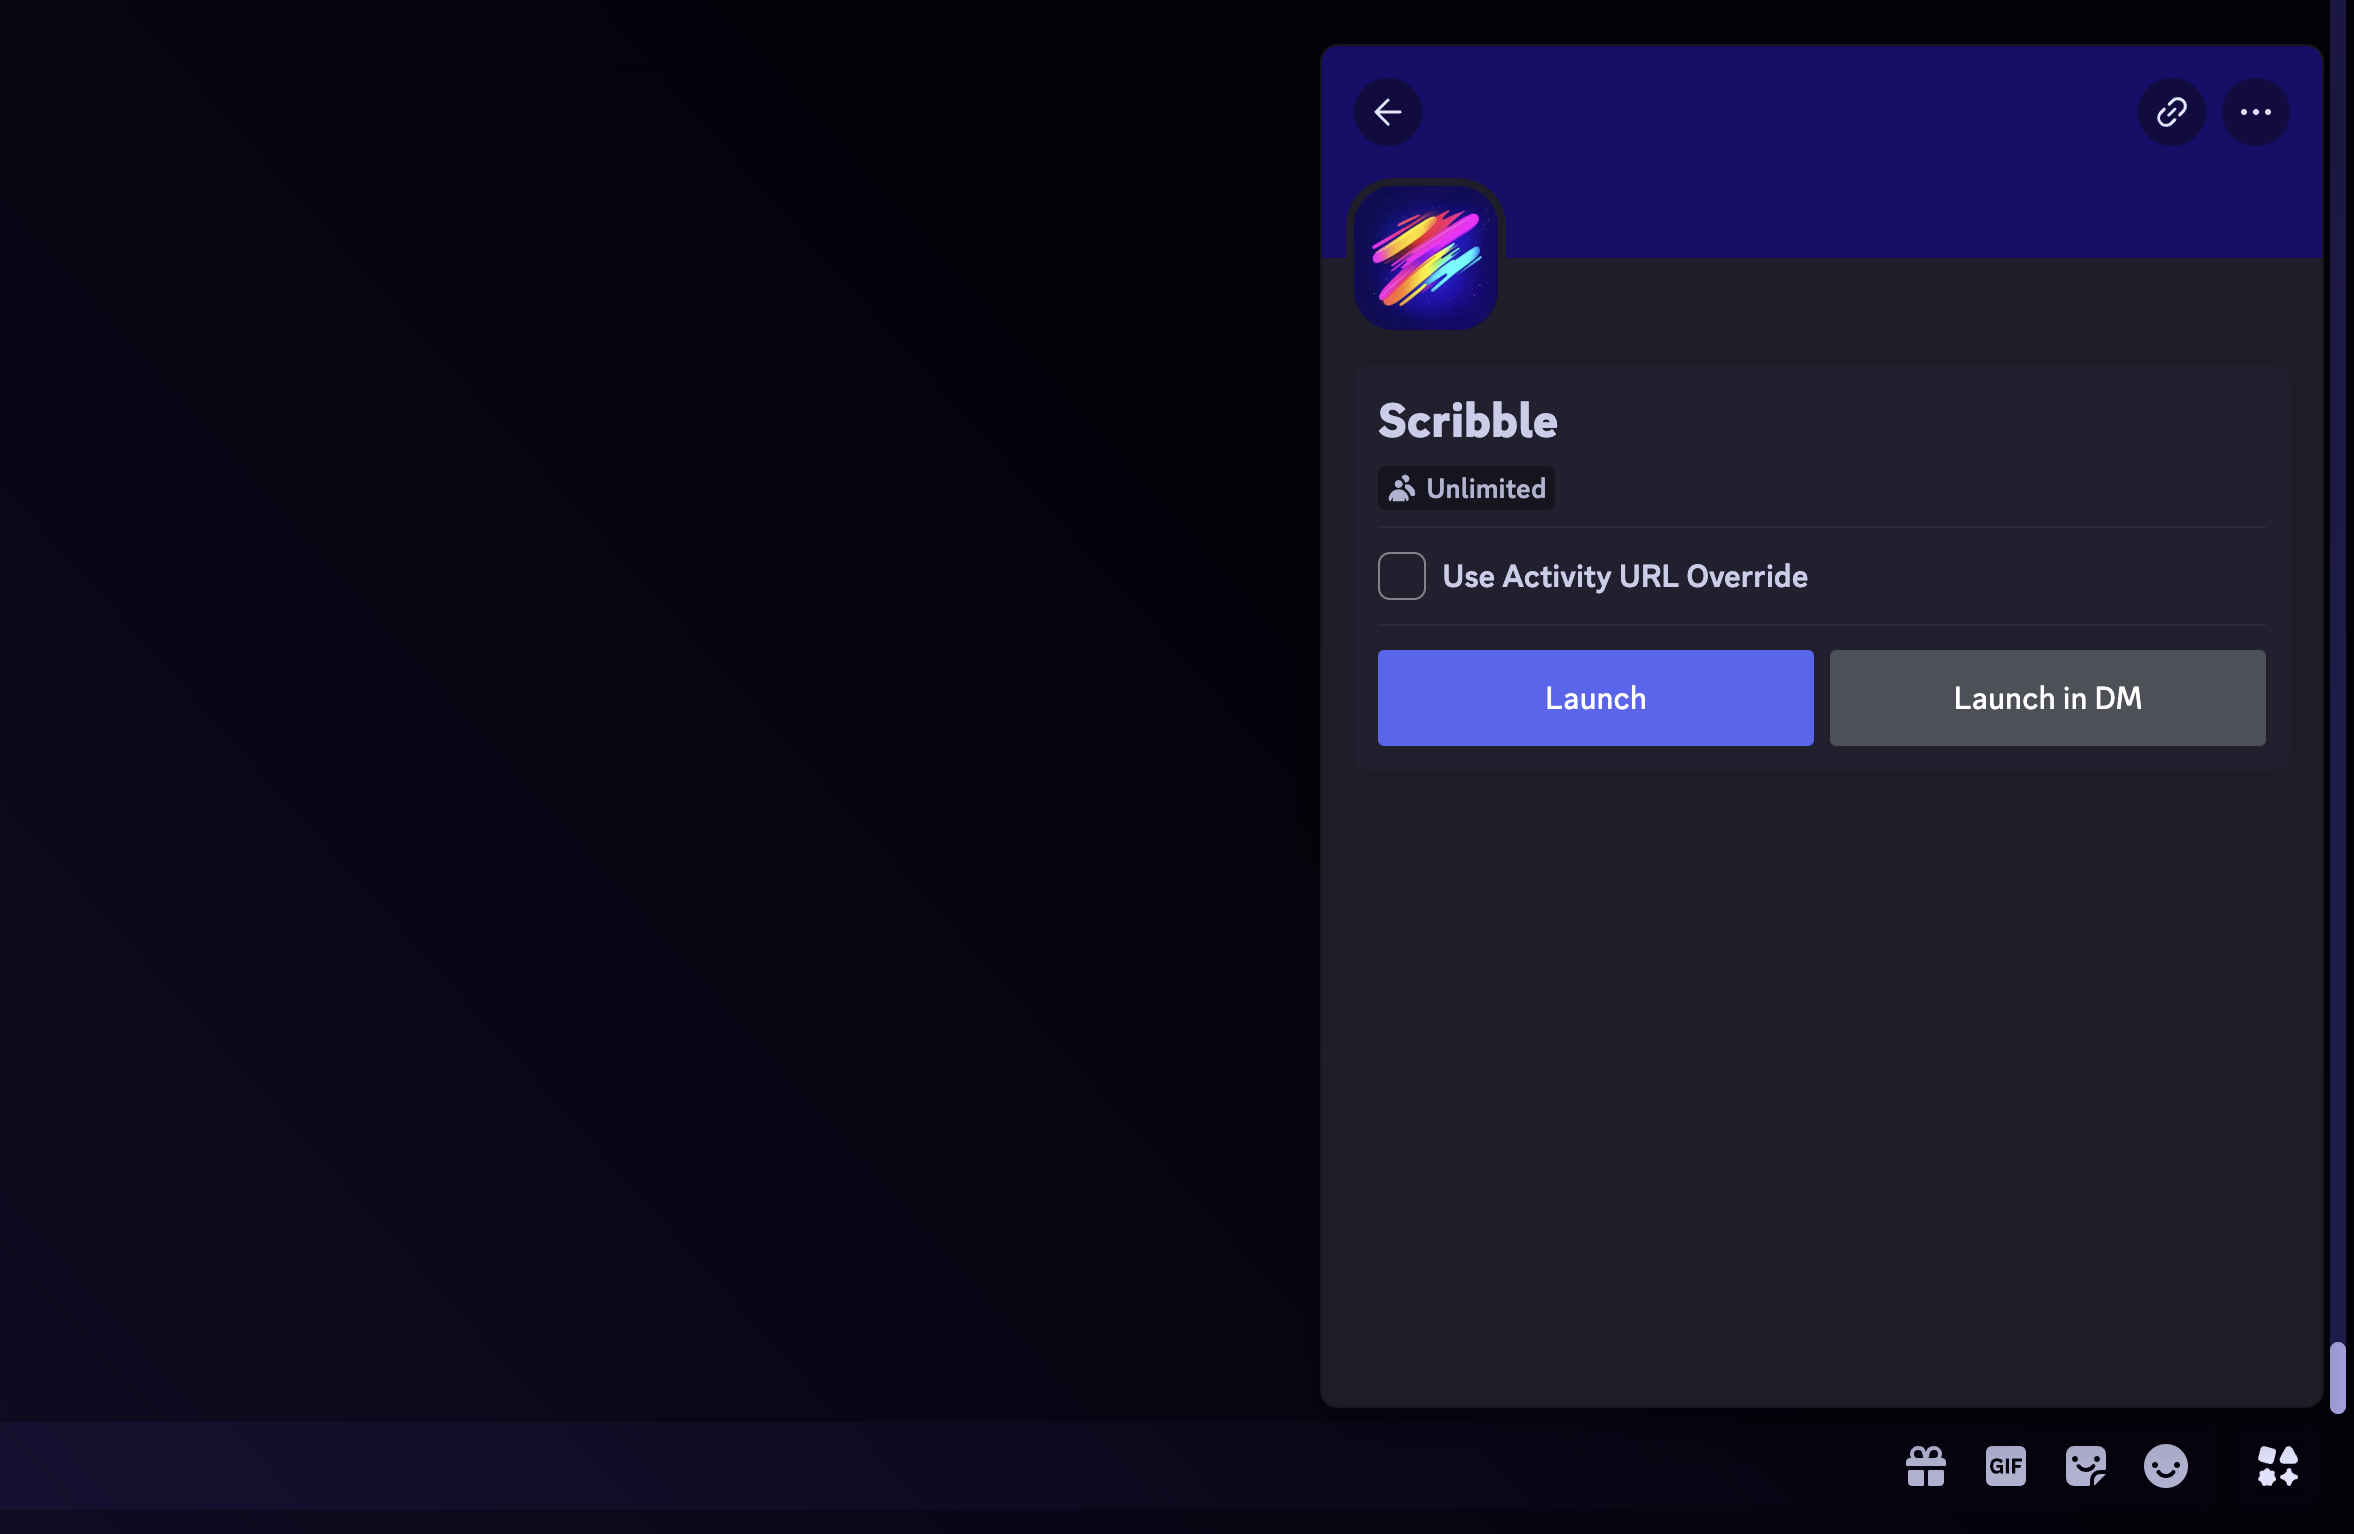
You may need to download Discord's Public Test Build or use Discord.com to see console logs and debug your activity.